# taro3.0多端开发尝鲜
前几天taro3.0发布了,我们首先看下介绍。
Taro 是一套遵循 React 语法规范的 多端开发 解决方案。
# 支持多种框架
Taro 目前支持 React、Nerv、Vue 三类框架,在未来 Taro 将开放拓展能力,使得开发者可以通过 Taro 拓展更多的框架支持。
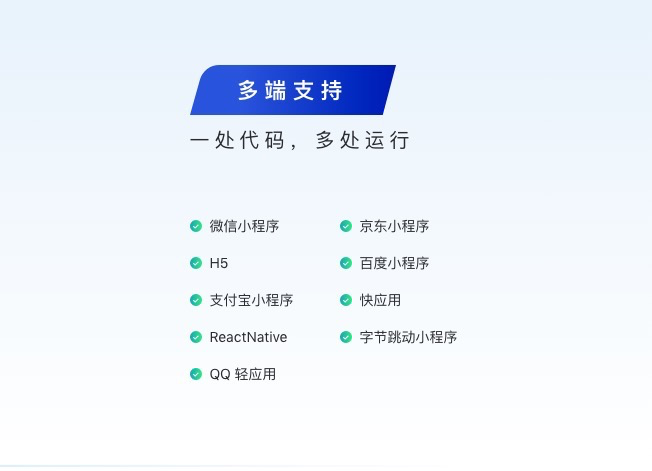
再看一张图,让你感受下他的强大之处。

看了这个是不是磨刀霍霍,那跟着我玩下吧,自己也可以跟着我玩下。
安装CLI 工具安装
- 首先,你需要使用 npm 或者 yarn 全局安装@tarojs/cli,或者直接使用npx:
# 使用 npm 安装 CLI
$ npm install -g @tarojs/cli
# OR 使用 yarn 安装 CLI
$ yarn global add @tarojs/cli
# OR 安装了 cnpm,使用 cnpm 安装 CLI
$ cnpm install -g @tarojs/cli
1
2
3
4
5
6- 检查是否安装成功,如果出现版本号就成功了。
Taro v3.0.2

3.0.2
1
2
3- 如果出现版本号,跳过这步
如果没有安装成功了,没有出现版本号,可能需要配置环境变量,这里我用我的电脑配置的步骤,如果还是不是会,自行百度。
# 打开配置表
$ open .bash_profile
# taro add
# TARO=自己安装taro的路径
$ export TARO=/Users/liukai/.config/yarn/global/node_modules/@tarojs/cli/bin
$ export PATH=$TARO:$PATH
# 保存配置
$ source .bash_profile
1
2
3
4
5
6
7
8- 好了,这样你就可以出现步骤2的版本号了,这样成功了,让我们开始吧!
项目初始化
$ taro init myApp1npm 5.2+ 也可在不全局安装的情况下使用 npx 创建模板项目
$ npx @tarojs/cli init myApp1- 会出现让你选择框架,看你熟悉那个,这里我选择Vue3,然后一路回车

- 你也可以选择style预处理 默认sass,也可以默认模板,我这里选择的是vue3-vuex

- 然后就等着安装依赖,这个要一点时间,耐心等耐就是了
项目目录

看下json中的启动项
"scripts": {
    "build:weapp": "taro build --type weapp",
    "build:swan": "taro build --type swan",
    "build:alipay": "taro build --type alipay",
    "build:tt": "taro build --type tt",
    "build:h5": "taro build --type h5",
    "build:rn": "taro build --type rn",
    "build:qq": "taro build --type qq",
    "build:quickapp": "taro build --type quickapp",
    "dev:weapp": "npm run build:weapp -- --watch", // 小程序
    "dev:swan": "npm run build:swan -- --watch", // 百度小程序
    "dev:alipay": "npm run build:alipay -- --watch", // 支付宝小程序
    "dev:tt": "npm run build:tt -- --watch", // 字节跳动小程序
    "dev:h5": "npm run build:h5 -- --watch", // h5
    "dev:rn": "npm run build:rn -- --watch", // React-Native
    "dev:qq": "npm run build:qq -- --watch", // QQ 小程序
    "dev:quickapp": "npm run build:quickapp -- --watch" , // 快应用
},
1
2
3
4
5
6
7
8
9
10
11
12
13
14
15
16
17
18项目实践
在做多端开发的时候,最好在编写的代码的时候多端调试,这样我们在测试的时候可以避免好多问题
- 启动小程序,并实现小程序分包
# app.config.ts
export default {
   pages: [
     'pages/index/index',
   ],
   subPackages: [{
     root: 'packageB',
     pages: [
       'pages/order/index'
     ]
   }],
   window: {
     backgroundTextStyle: 'light',
     navigationBarBackgroundColor: '#fff',
     navigationBarTitleText: 'WeChat',
     navigationBarTextStyle: 'black'
   }
 }
1
2
3
4
5
6
7
8
9
10
11
12
13
14
15
16
17
18
2
3
4
5
6
7
8
9
10
11
12
13
14
15
16
17
18
config中添加subPackagess实现分包
- 在src文件夹下创建packageB文件夹
- 在packageB创建pages文件夹
- 在pages常见order文件夹
- 在order文件夹下创建index.vue和index.config.js
# index.vue
<template>
  <view class="apple">
    <view>order</view>
    <view>{{count}}</view>
  </view>
</template>

<script>
  import { reactive, toRefs } from 'vue'
  export default {
    setup() {

      const state = reactive({
        count: 1
      })

      return { ...toRefs(state) }
    }
  }
</script>

<style>
  .apple {
    font-family: "Avenir", Helvetica, Arial, sans-serif;
    -webkit-font-smoothing: antialiased;
    -moz-osx-font-smoothing: grayscale;
    text-align: center;
    color: #2c3e50;
    margin-top: 60px;
  }
</style>
1
2
3
4
5
6
7
8
9
10
11
12
13
14
15
16
17
18
19
20
21
22
23
24
25
26
27
28
29
30
31
32# index.config.ts // 设置页面配置 export default { navigationBarTitleText: '订单', navigationBarBackgroundColor: "#ff3c4b", }1
2
3
4
5
这样你在打包的时候就可以实现小程序的分包功能,通过一个简单的项目来实现,后期还是根据我们的需求进行深入的实践。
- 同步更新中...